
When it comes to WooCommerce, things are pretty simple. WooCommerce is perhaps the most powerful digital marketing platform in the world. It is ridiculously flexible, cost-effective, and simple to handle.
You’re trying to build an eCommerce business via WooCommerce, but you’re having some difficulties working through the obstacles? Such as managing WooCommerce images? Rest assured, you’ve come to the right place at the right time.
WooCommerce product images can help you get more clicks and conversions. According to research, 87.6% of customers consider the product image the most critical aspect of their shopping experience.
In today’s article, we will provide you with the right know-how to add the most spectacular product images to your WooCommerce website and all the relevant know-how you need.
Shall we get started?
Let’s talk about product images for a second. Here are some questions you might be struggling with:
- How should I create the best WooCommerce product images?
- How can I change the product image size in WooCommerce?
- How can I compress and resize images?
Having high-quality images on your website has become more relevant than ever. As per Internet Live Statistics, there are almost two billion websites in development today. Do you know what this means? It means that your website is a tiny fish in a massive ocean.
So the question is: What can you do differently? How can your eCommerce store stand out from the rest?
The way you display your product images is significant. Why? Because it is the only way for customers to grasp what your website looks like. They can instantly say whether you inspire trust or make them second guess your product by skimming through your website. Besides, it’s an effective way to increase your conversion rate. Do you want to sell or not?
But again, there’s a happy middle ground. By optimizing the product images of your WooCommerce store, you can still provide a lot of detailed product images without slowing down your website.
This article will walk you through the necessary steps you need to make to have an aesthetically pleasing eCommerce website that will delight your customers and make them come back for more. ?
How to create the best WooCommerce product images

Google firmly thinks that “a picture is worth a thousand words.” So, instead of informing your customers about your product’s characteristics, make sure you take a decent picture that will do the talking. However, this is not to say you should skip adding catchy copy to your images because that also plays an important role.
Nothing makes a product page more valuable than a product image. WooCommerce makes it extremely easy to insert product photos and product image galleries to suit your items.
Did you know? SEO experts have found that if customers are provided quality pictures to look at, they will stay on the site for a more extended period. It makes sense, right?
Adding images to your site ends up killing two birds with one stone: it improves your user experience and your ranking by lowering your website’s bounce rate.
First things first: creating your product list and adding the images. We’ve put together an article about how to add products and set up a shopping cart using WordPress, so you might want to head over there for a better insight.
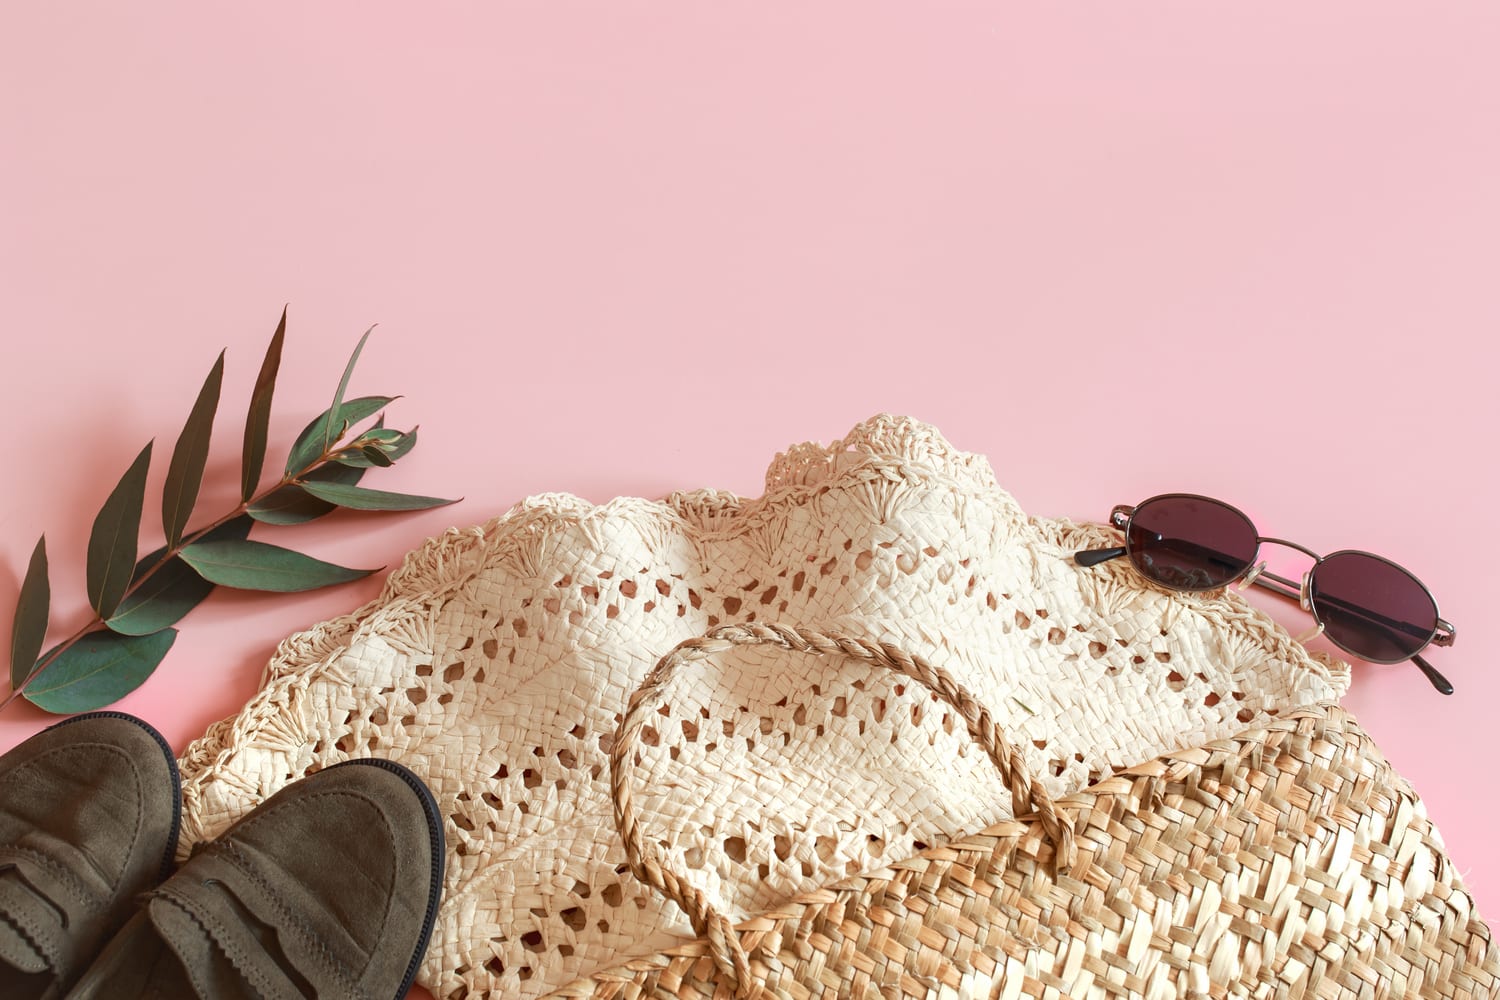
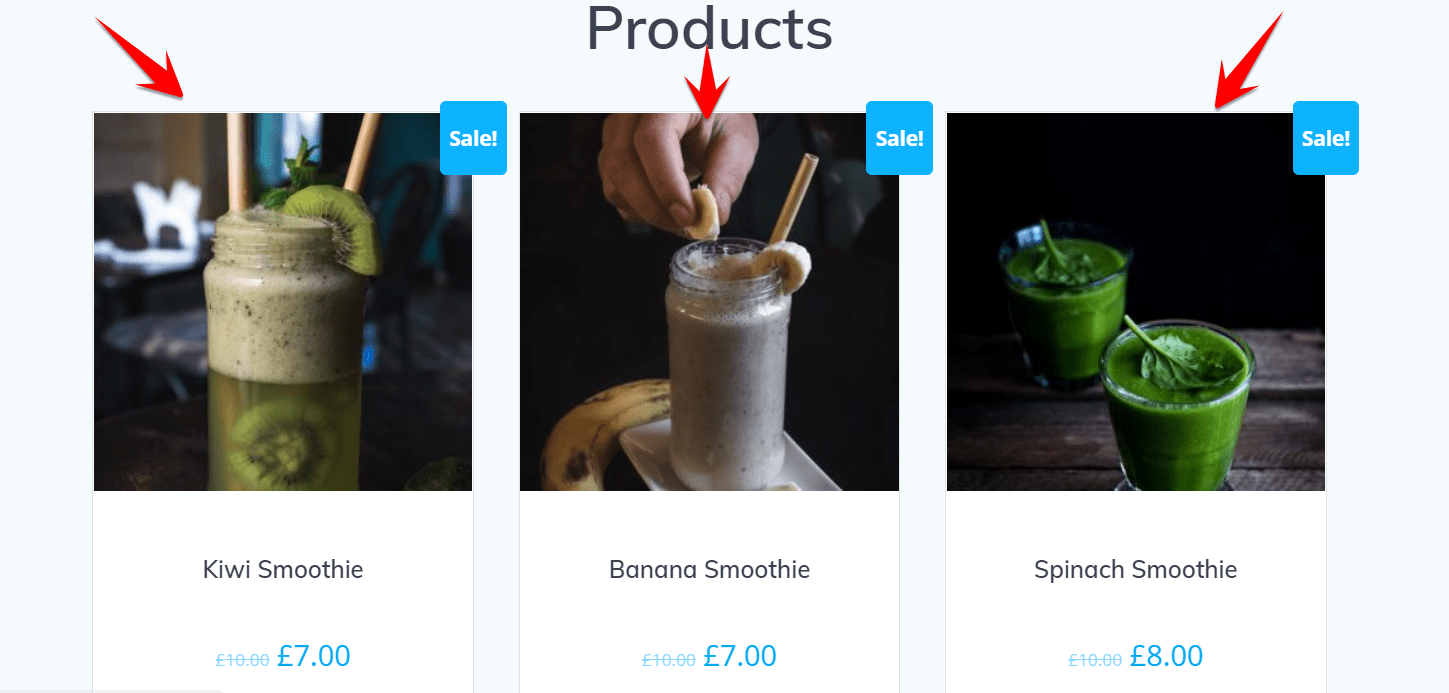
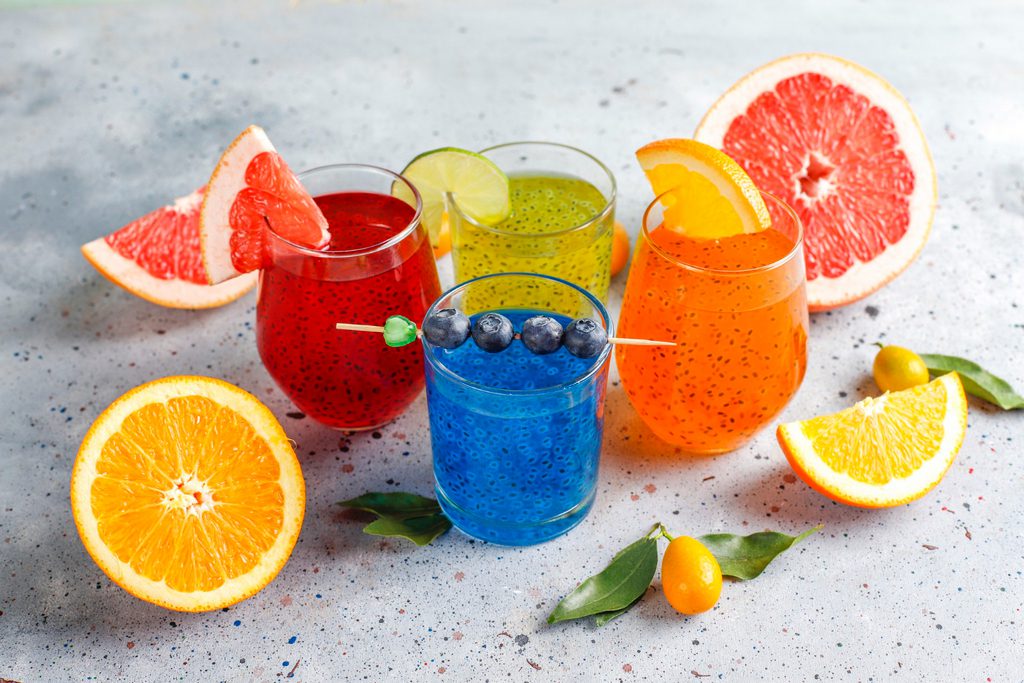
Helpful tip: A high-resolution picture of the whole product against a white background is often an excellent option unless the item itself is white. In this case, you’re going to need some contrast. Dark pictures can come out just fine. See the image we’ve used for our smoothie website. Make sure that you use natural lighting whenever possible.
The main photo should include the entire product, but you can also add additional images for your goods. For example, if you’re selling a backpack with a few unique pockets, you might want to take pictures from different angles and then allow potential customers to scroll through them. This way, your customers will get a full view of what they’re buying.
Helpful tip: Don’t forget to show different colors and styles! ?
Customers may know what the cherry color looks like, but having a visual comparison in front of them could be the indicator they need to purchase. You’ll also want to ensure that your product image shifts as your customers fetch through various colors and patterns.
How exactly are you supposed to do that? That’s easy. Head to your Dashboard -> Add New Plugin, then install the Dynamic Product Gallery for WooCommerce plugin, which will allow you to make all sorts of adjustments and modifications.

Another thing you might want to do is provide a zoom option. Zooming will allow your customers to get a detailed view of the product and see every little aspect of it. Zooming can come especially handy in case you’re selling clothing items.
If you’re having difficulties shooting with proper natural light and the pictures don’t highlight the authentic fabric of the item, you can always zoom in to get a more detailed perspective.
Now that we’ve narrowed down the basics of creating a quality product page for your eCommerce website, it’s time we solve another one of your problems: ?
How to change the image size in WooCommerce

The thing about eCommerce stores is that they are very different from one another, yet they share the same purpose. There’s even a famous saying in this industry: “What is seen is sold.” – no wonder why.
However, there are tiny things to consider when seizing and compressing your product images. In addition, because there are highly versatile sizes of WooCommerce product images, it is not always easy to figure out how to adjust them to meet your business’s criteria.
But you might wonder why you need to customize your WooCommerce product images? There are two significant reasons for that:
- Say goodbye to blurry images
- Say hello to higher website performance and speed
Speaking about speed, did you know you can create retina-ready images that won’t slow down your WordPress website?
A Note on Retina Images
Retina Images are particular images created to look sharp on Retina displays. So what is a Retina display? Any screen that Apple has decided to call like this.
However, websites that are not adapted for these screens look smudged and less attractive. Retina devices have more pixels per inch, so they need high-resolution photos to blend in with all those extra pixels.
The technology used to showcase the images on your digital platform is a significant determinant. After all, who doesn’t want the best-looking images on their website?
To create retina-ready images on your WordPress website, you’ll first need to install the WP Retina plugin.
You may have noticed that sometimes, you had “-scaled” suffixed files at the end of your image files. That’s because WordPress naturally resizes large images. Nonetheless, installing this plugin will give you more control over this feature.
But for now, let’s see how we can resize and compress our product images in WooCommerce.
A new and simple way to customize image sizes for your products has been incorporated from the WooCommerce 3.3 version. Furthermore, you don’t need to replenish any of the images after customization.
You can crop, resize, and regenerate your images in a heartbeat.
Below are the steps you need to follow to resize your images. ?
- Go to Appearance -> Customize
- From there, head on to WooCommerce -> Product Images
- Write down your preferred size in the “Main image width” field
Hit Publish!
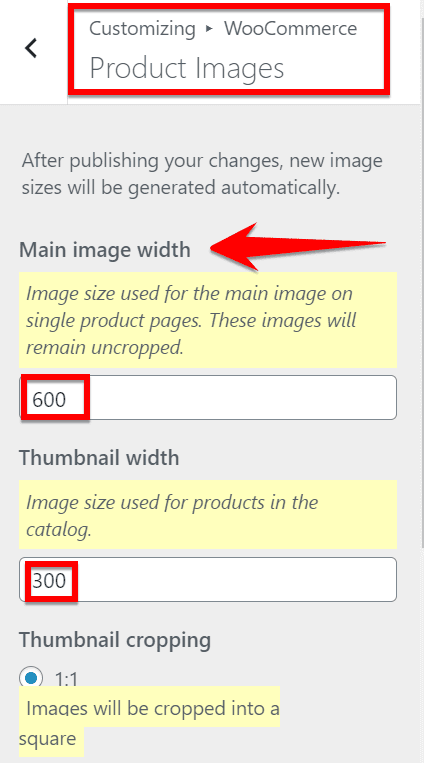
Hint: These modifications won’t affect the height of your image.
How to customize your thumbnails in WooCommerce
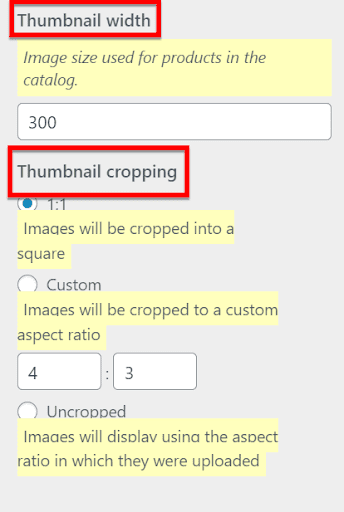
- 1:1: If you pick 1:1, your photos will be divided into squares.
- Custom: You can then choose the image’s aspect ratio in Custom. Here are some common aspect ratios (1:1, 5:4, 4:3, 3:2, 16:9, and 3:1).
Uncropped: The height of the image is unaffected. Photos will be displayed using the aspect ratio in which they were posted.
What about WooCommerce photo reviews?
This is an excellent method to provide social validation for new customers and generate new material for your goods and services. You can even use the WooCommerce Product Reviews plugin to build a competent and innovative WooCommerce Photo Reviews section.
Customers can top-up or discredit their reviews of the WooCommerce product. This enables potential clients to recognize valid and useful evaluations and ignores low-quality feedback.
To Wrap Up
Let’s recap the things you’ve learned today to create the best product images using WooCommerce.
Key takeaways:
- Pay attention to how you display your product images—the better the quality, the higher the chance of selling.
- Keep your background simple and use natural light.
- Set the adequate image size for your products for better quality and higher website performance.
- Take a second look at your thumbnails and customize them accordingly.
Now, over to you! The ball is in your court. Optimize and adjust your product images and enjoy the outcome.

Gabriella is a Digital Content Writer and Marketer with a zeal for all things WordPress. When she’s not researching and drafting the upcoming articles, you can find her in the open air exploring the outdoors with her dog.


Comments are closed