
- Why Should You Customize Your WooCommerce Category Page?
- The Benefits of Customizing your WooCommerce Category Page
- How to Edit and Customize Your Category Page – Step by Step
- A Little Something to Help you Create Custom Category Pages
- Personalize Category Pages in WooCommerce Using Product Tables
- Create your own WooCommerce category page design with a Shortcode
- Over to You
In our previous articles, we’ve talked about managing your product categories, product attributes, and tags for your WooCommerce online store.
Now, for those of you who are not familiar with product categories, here’s what you should know:
Product categories are responsible for grouping all similar products under one category. You’re looking to buy a travel bag from a famous retail company, navigating through their website trying to find what you’re looking for. Well, for starters, you won’t look for that specific product in the jeans category, that’s for sure.
In a broad sense, product categories act as filters, gathering all similar products in one place, so it’s easier for the customer to steer through them. Curious to find out how can you create them? We’ve got a glimpse for you: ?
First of all, head over to your WordPress Dashboard → WooCommerce → Products. Then, once you click on Products, you’ll see a list of three items such as Categories, Tags, Attributes.
From that list, make sure you click on Categories, and you’ll see a category window pop up from where you can manage all categories and create new ones. See the screenshot below for reference: ?

Now that you know a bit about the technical side of categories, do you know how to give them a little sparkle and make them stand out from the rest? Do you have what it takes to customize it like a pro properly?
If the answer is no, you’ve come to the right place.
In today’s article, we’ll walk you through how to effectively and efficiently customize your WooCommerce category page and all the steps you need to take for it to happen.
First of all, you might be asking yourself why you should customize your category page? Isn’t it good enough the way it is? Unfortunately, the answer is no, and I’ll spare you the research on this and tell you why.
Why Should You Customize Your WooCommerce Category Page?
So you know that the category page displays all of your WooCommerce store’s products that fall into one category. Great! So, it doesn’t surprise that even though customers usually search for products on other pages, they may find it easier to search for items on the category page. For example, if you don’t know the product’s name but know its category, you’ll most likely look for it on the category page.
Furthermore, if the category page favorably influences your customers, they may stay on your website longer. Because these pages are often disregarded, customizing them will help you stand out and improve your customers’ experience.
The good news is that you can easily design your category page using WooCommerce. The bad news is that WooCommerce’s default options are minimal. For example, you can only change the name, slug, parent category, description text, display type, and thumbnail for each category page.
You can also use the theme customizer to change other aspects, but if you want to take your category page to the next level, you’ll need something else.
As a result, in this post, we’ll show you how to change your category page in WooCommerce and make it easier for your consumers to explore your site and some added benefits.
The Benefits of Customizing your WooCommerce Category Page
This can go way beyond a couple of paragraphs, but here are a couple of well-known advantages of a custom category page to give you an idea.
A significant advantage of a customized category page is that it boosts revenues and profits. In addition, by designing a better WooCommerce category page, you will be able to present your goods in the best light possible, increasing consumer interest in purchasing them.
Last but not least, creating a custom WooCommerce Category Page will help you enhance your SEO significantly. The default WooCommerce Category Page has weak SEO, and it comes with very little content and isn’t optimized for search engines. Customizing it creates an excellent opportunity to achieve a significant competitive advantage.
As a matter of fact, according to Baymard Institute:
“32% of e-commerce sites still don’t have any kind of category pages. During testing, sites without intermediary category pages suffered greatly as many subjects made wrong selections or were unable to define an appropriate scope, leaving them with very broad categories, and often thousands of products to consider.”
Making your category page look better and more sophisticated will result in higher revenues, more website traffic, and improved SEO.
What customizations can you add to these pages? Well, here’s a short checklist:
- Add large and bold images highlighting the details of your products
- Add catchy copywriting to the product descriptions
- Make use of plugins to give your categories the extra flair they need
So without further ado, let’s see how you can customize your WooCommerce category page! ?
How to Edit and Customize Your Category Page – Step by Step
Add Larger Product Images
No matter where they appear, teeny-weeny advertising pictures are controversial. It’s a concern if your customers have to squint to see the detail in your thumbnails. On laptops with retina screens, big smartphones, or widescreen monitors, tiny thumbnails or sample images are a hassle. The solution is to enlarge the photos and show more clarity.
Here’s a pretty good example of how to include large and bold product images:
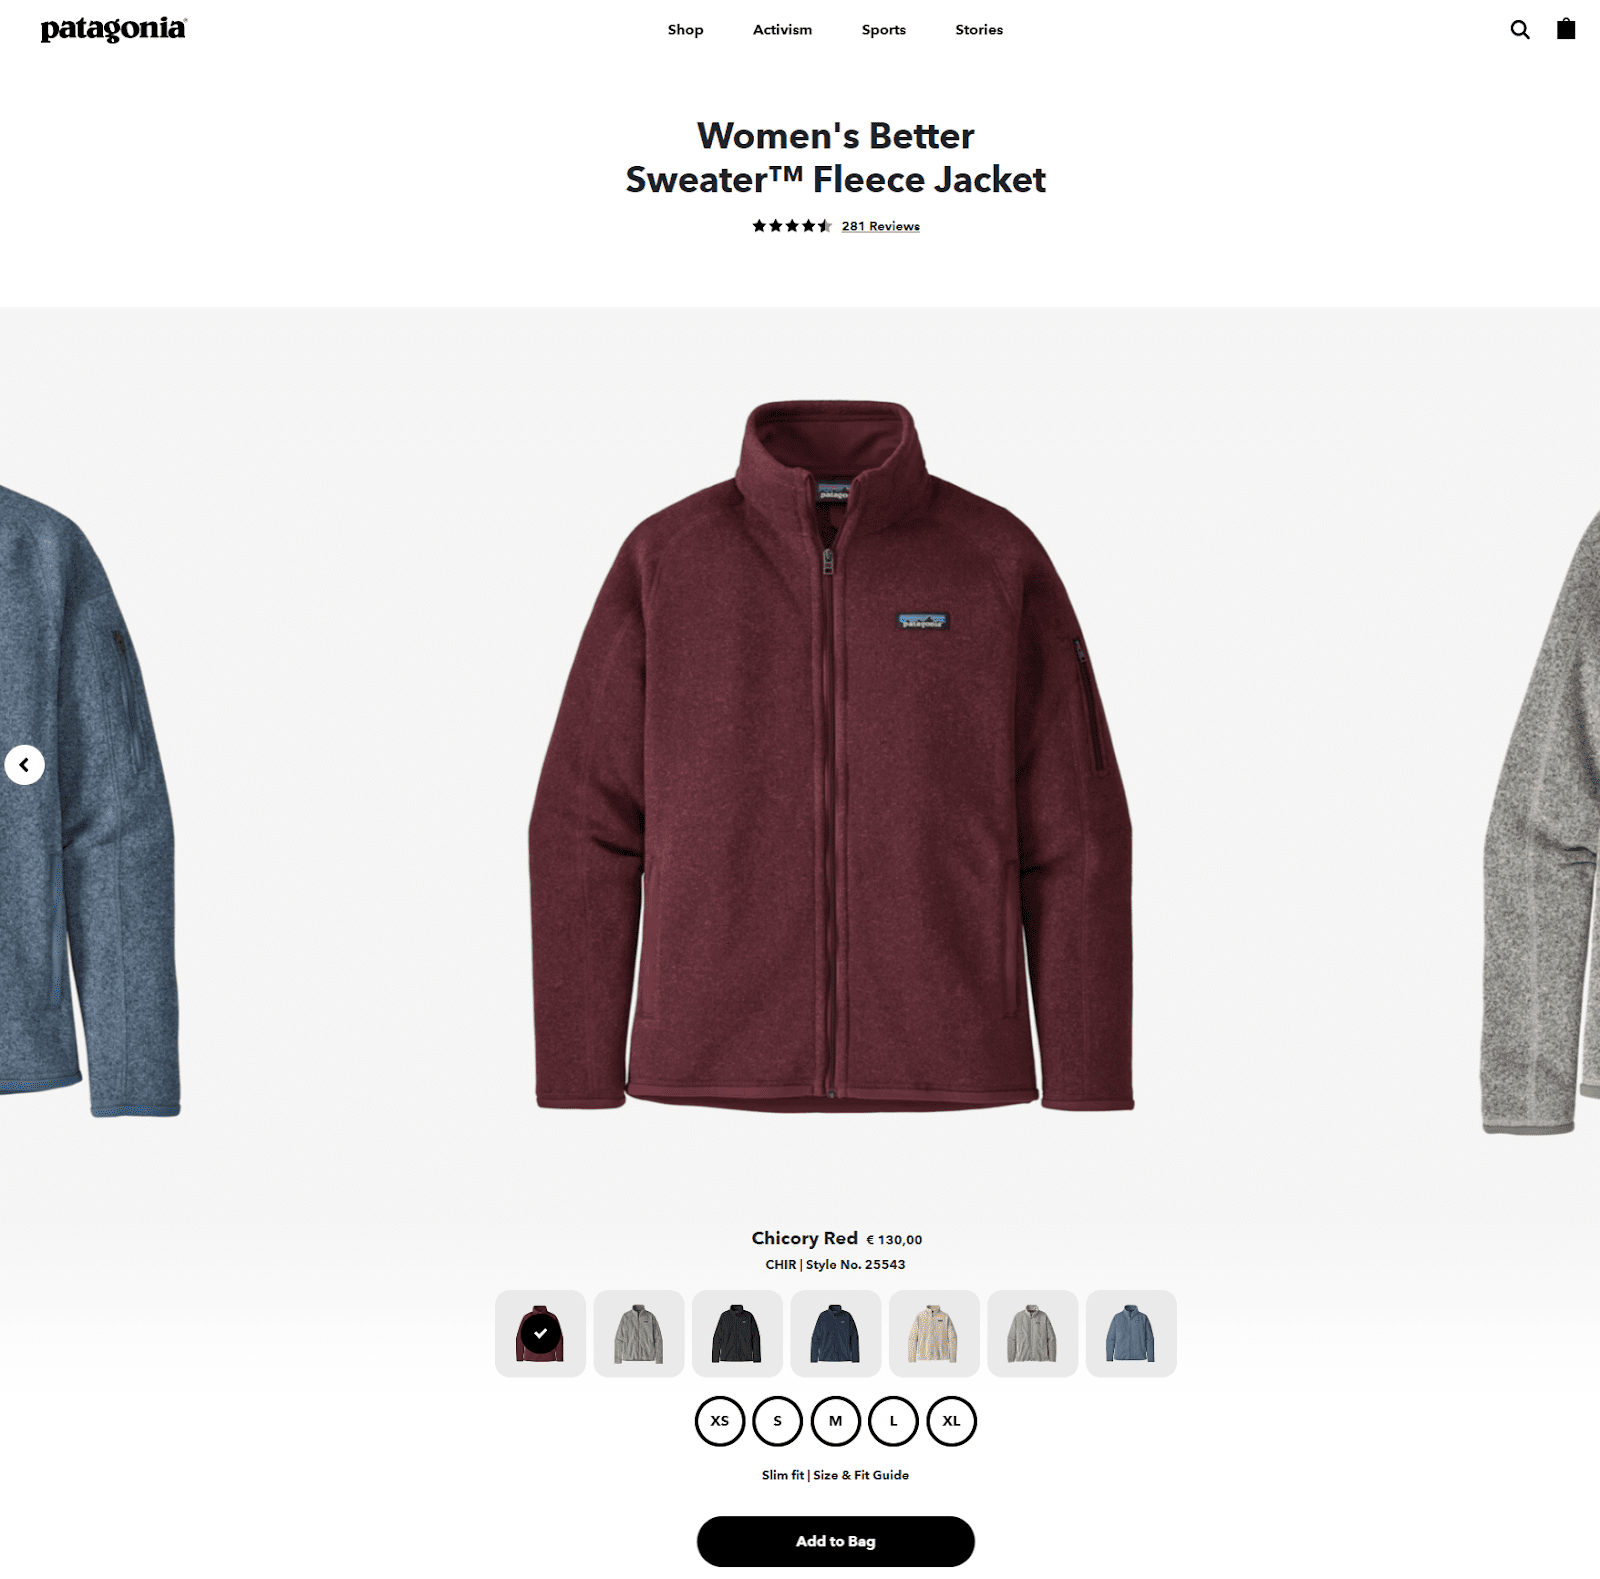
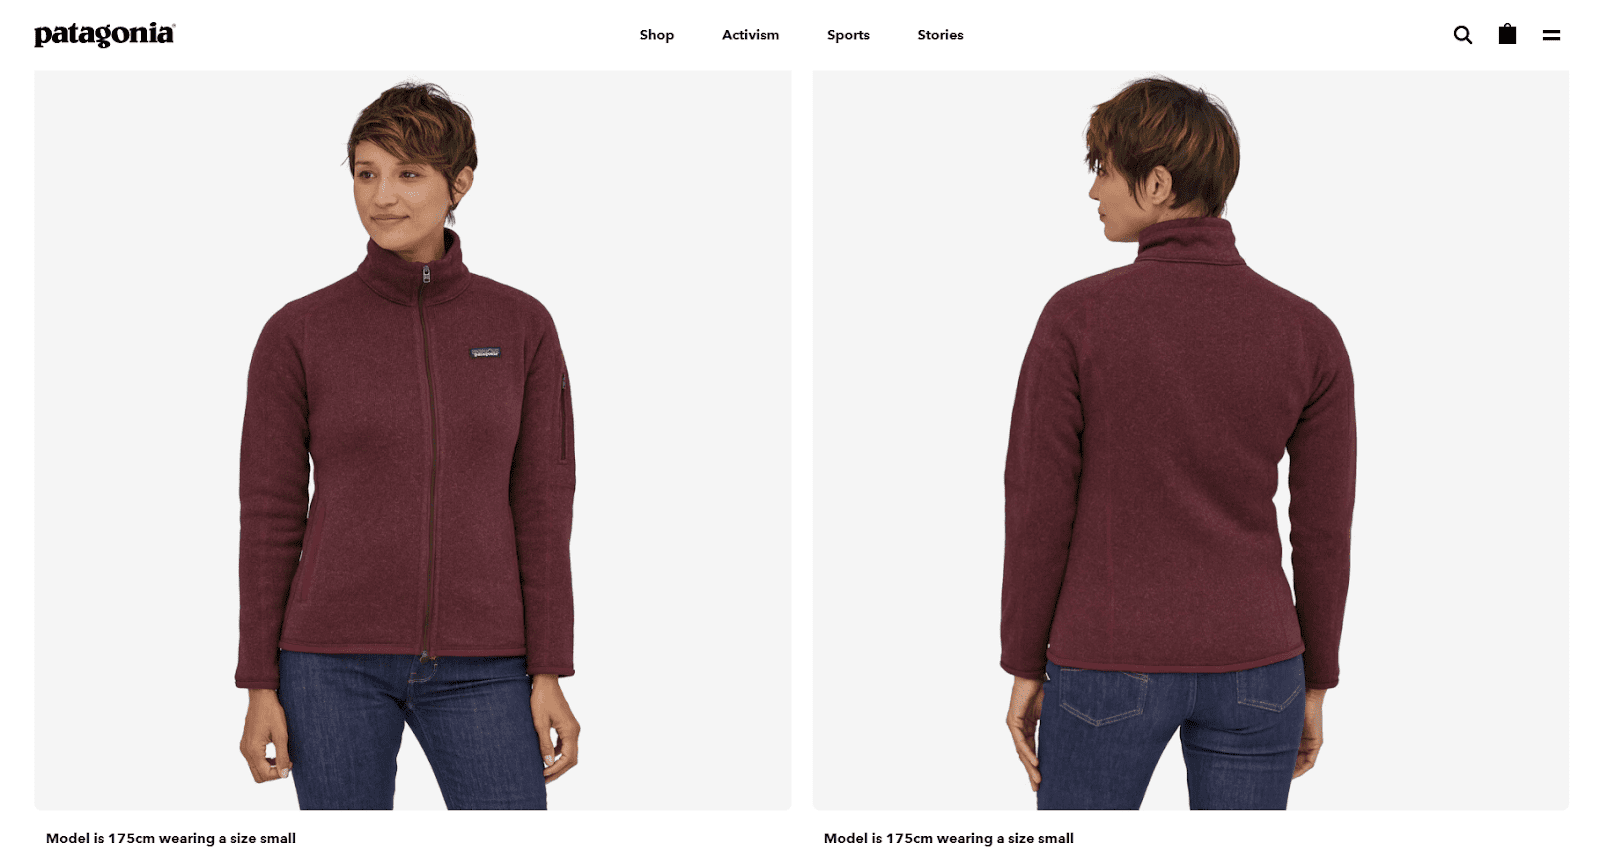
Patagonia is a well-known online store that focuses on providing an accurate and almost touchable point of view to the customer. By implementing large images like such, customers can grasp their product looks like.
This is how you add bold images using WooCommerce:
First, go to your WordPress Dashboard → Products → Categories, and then hit ‘Upload/Add image”.

Once you click on ‘Add an image,’ your Gallery will pop up from where you can choose your desired image.

After adding the image, it’s time to set its size according to your needs.
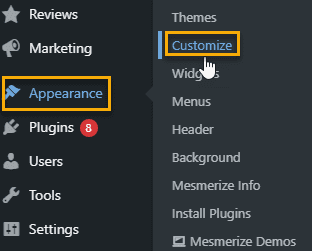
For this, go to Appearance → Customize → Woocommerce → Product Images.
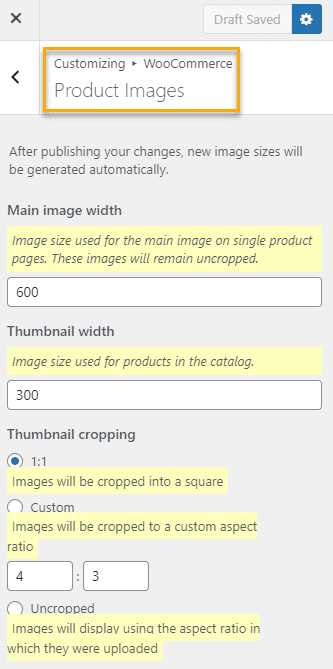
From here, you can set the featured image’s size to appear the way you want it.
Don’t Underestimate the Power of Good Copywriting
You’ve probably had some experience with copywriting for your product pages and homepage, but your use of it outside of those areas might be minimal. So, you might want to get your creative writing skills ready because you’ll need them.
On the category pages, copywriting has its perks. It informs shoppers what each category contains, makes the page appear less bare, and provides essential background clues to search engines.
Here’s another example from Patagonia and their simple yet straightforward and catchy copywriting:
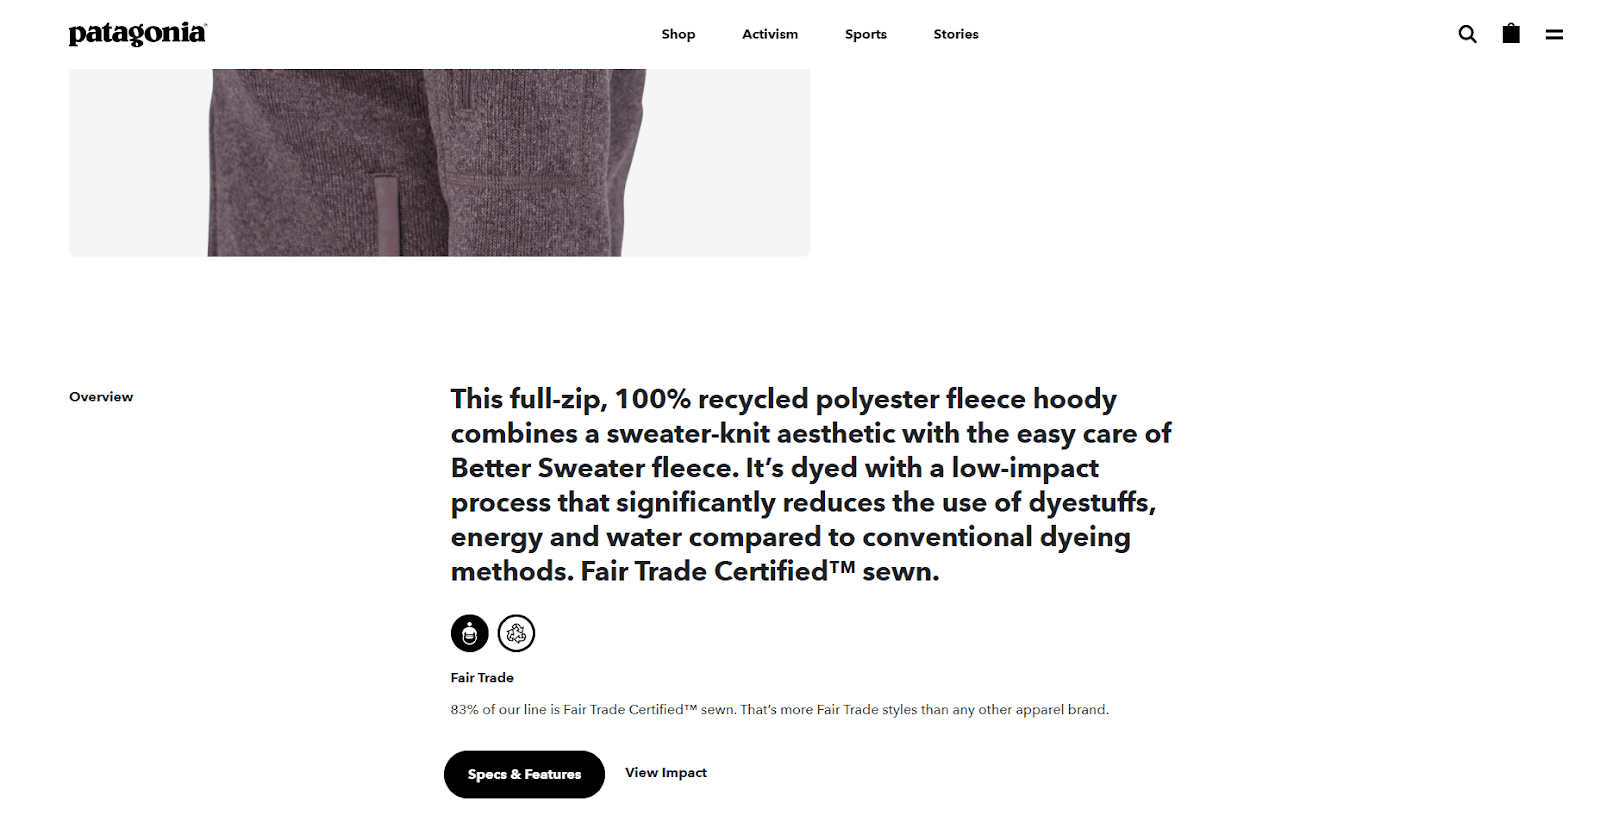
Remember that a single copy page won’t help or hinder your SEO — it’ll only add a little more meaning overall, so it’s not something you should be too concerned with.
This is how you add product copy in WooCommerce:
From your Dashboard, go to Products → Add New, and you’ll see a section where you can include an accurate product description.

If you’d like to edit an already existing product, head over to Products → All Products and hit the small ‘Edit’ icon under the product. Like this: ?

The same white space will appear in which you can type in the desired description.
Below you’ll see another excellent example of copywriting done well by a famous clothing and surfwear company whose primary goal is to keep our oceans clean and provide high quality and sustainable products.

A Little Something to Help you Create Custom Category Pages
Developing your own custom WooCommerce category page layout doesn’t have to be challenging at all. With the appropriate plugin, you will be able to create precisely what you have in mind without having to spend countless hours working on it.
I will give you insight into using the WooCommerce Product Table Lite plugin, which will completely control how information is shown and how customers approach your goods.

This plugin displays your WooCommerce products in a customizable table layout, with the ability to add filters, search boxes, scrollbars, and much more.
You could also use the plugin to restrict the display of products to different categories or subcategories. For accomplishing the above, WooCommerce Product Table offers two options:
- The product table layout can be enabled centrally on all product category pages. This is ideal if you want to personalize all of your product category pages.
- You can also manually create your WooCommerce category pages by using a shortcode. For example, if you only want to list products from specific categories in the table.
We’ll show you how to configure the WooCommerce Product Table to accomplish both possibilities down below.
Personalize Category Pages in WooCommerce Using Product Tables
You’ll want to configure the WooCommerce Product Table plugin’s default settings after you’ve installed and activated it. To begin, navigate to WooCommerce → Settings → Products → Product Tables.
First, go to the Add a New Product Table and look for the Columns setting. This is where you will have control over what information appears in your table. For example, you can display product attributes, custom fields, and other information in addition to core product information.

From this section, you have two options: one with adding additional information about products, the other with adding product images. If you hit Add a Column, I’ll present the screenshot below from which you can choose to select whatever you’d like.

If you’d like to make adjustments to the product text, then this is where you need to go for this window to pop up: ?

If you hit Product Image, the same thing happens: ?

Furthermore, you have the option to adjust your Query elements, such as product quantity, product category, SKUs, product IDs, and much more: ?

Then, if you go to Navigation, you’ll be able to add navigation buttons to your category page, just like this: ?

Create your own WooCommerce category page design with a Shortcode
First off, what’s a shortcode?
A shortcode is a tiny snippet of code that adds a unique function to a WordPress site. Because most shortcodes are not included in WordPress themes or plugins, they can be integrated into pages, posts, and text widgets wherever a user wants to add that feature – or erased when the feature is no longer required.
To begin, go to Pages → Add New and create a basic WordPress page. Then, on the page, insert the [product table] shortcode. You can also use the regular title field to add a category title.

The shortcode will showcase all of your WooCommerce products by default. However, if you feel like you need more information about WooCommerce shortcodes, here’s an article specifically about this topic, answering all questions you might have.
One final suggestion. Remember to cater to customers who may accidentally click on the wrong link or end up in the wrong location. It’s essential to make your category pages good-looking and functional and easy to use. Consider your users’ experience right off the bat rather than the page’s appearance.
Use Page Builders
In WooCommerce, the appearance of product category pages is controlled by a template on the theme you use. If you are not a fan of the default appearance of the product category pages available with your theme, you can create a custom template to replace it. This is usually done with page builders such as Elementor, Divi, etc.
Let’s take Divi for example.

Divi is one of the most popular WordPress themes, and for a good reason. It has a lot of functionality and is compatible with WooCommerce, perfect for customizing category pages.
This theme includes a drag-and-drop builder that allows you to customize the category page template. In this manner, you may design a category page template that you can use for all of your WooCommerce store’s category pages.
To begin using Divi, you must first install and activate it. After that, you can download the Divi zip file from their official website. Then navigate to Appearance –> Themes –> Add New on your WordPress dashboard.
To upload the Divi.zip file to your site, go to Upload Theme and select the file you just downloaded. When it’s finished uploading, click Install Now to install the theme and activate it once it’s finished. The Divi builder, the in-built page builder that we’ll use to customize the category pages, will be installed when you activate the Divi theme. And, you’re done!
Over to You
Category pages are essential – make them stand out!
There are nearly limitless ways to improve the effectiveness of an online store. For example, you may not have expected that optimizing your category pages could make a significant difference. Still, these pages are just as important as any other component of your store.
You’ll be ready to take these boring pages to the next level by adding some copy, ramping up the size of your photos, or attaching some well-placed links or information. Feel free to experiment with one or two of these strategies and see what happens!
Gabriella is a Digital Content Writer and Marketer with a zeal for all things WordPress. When she’s not researching and drafting the upcoming articles, you can find her in the open air exploring the outdoors with her dog.
Comments are closed