

- Understanding WordPress Permalinks
- Types of Permalink Structures in WooCommerce
- How to Create Custom WooCommerce Permalinks
- How to Change WooCommerce Permalinks
- How to Change WooCommerce Permalinks for Single Posts and Pages
- Best Practices for SEO-Friendly Permalinks
- What happens when you modify a URL?
- Over to You
Don’t worry; we got you covered.
The permalink is the full URL that you see – and use – for each post, page, or other pieces of content on your website. It’s a permanent link, so it’s called a permalink. WordPress URLs, by default, use the query string format, which looks like this:
http://www.example.com/?p=233
In other words, a permalink is a link that leads to a specific piece of content on your website.
For example, our homepage’s link is https://iconvert.pro/, our blog is https://iconvert.pro/blog/, and a single blog post is https://iconvert.pro/blog/what-are-woocommerce-sliders/.
See the difference? Permalinks are also used for archive pages, static pages (a homepage is usually a static page, while the blog is dynamic), and any other content on your site that requires a unique URL.
In this article, we’ll talk about understanding WooCommerce permalinks, how to create custom permalinks, and, lastly, how to optimize your permalinks for higher SEO ranking!
Understanding WordPress Permalinks
A good permalink is essential for your website to look professional. Creating an effective permalink structure for your website is also advantageous for SEO. Using these permalinks, we can identify specific blog posts, pages, or other content on your website.
Now, let’s take a look at this URL:

Clean and organized, right? How about this one below?

Not so clean and organized anymore.
If you don’t use a Content Management System (CMS) like WordPress to run your website and instead have folders of individual files you edit (a bad idea, but that’s a topic for another time), the URL will be whatever you name your file. So, for example, if you call your webpage “contact.html,” when you save it, your URL will be:

However, things will be much easier to manage if you use a CMS.
As an admin user, you can quickly and easily set custom rewrite rules from the admin panel. The WordPress Rewrite API, which provides functions and hooks that take permalink customization to the next level, allows advanced users and developers to get even more.
If you are building your online store with the help of WooCommerce, you can specify the base permalink values for your shop and product pages. Just head over to WordPress → Settings → Permalinks to configure WooCommerce permalinks. ?
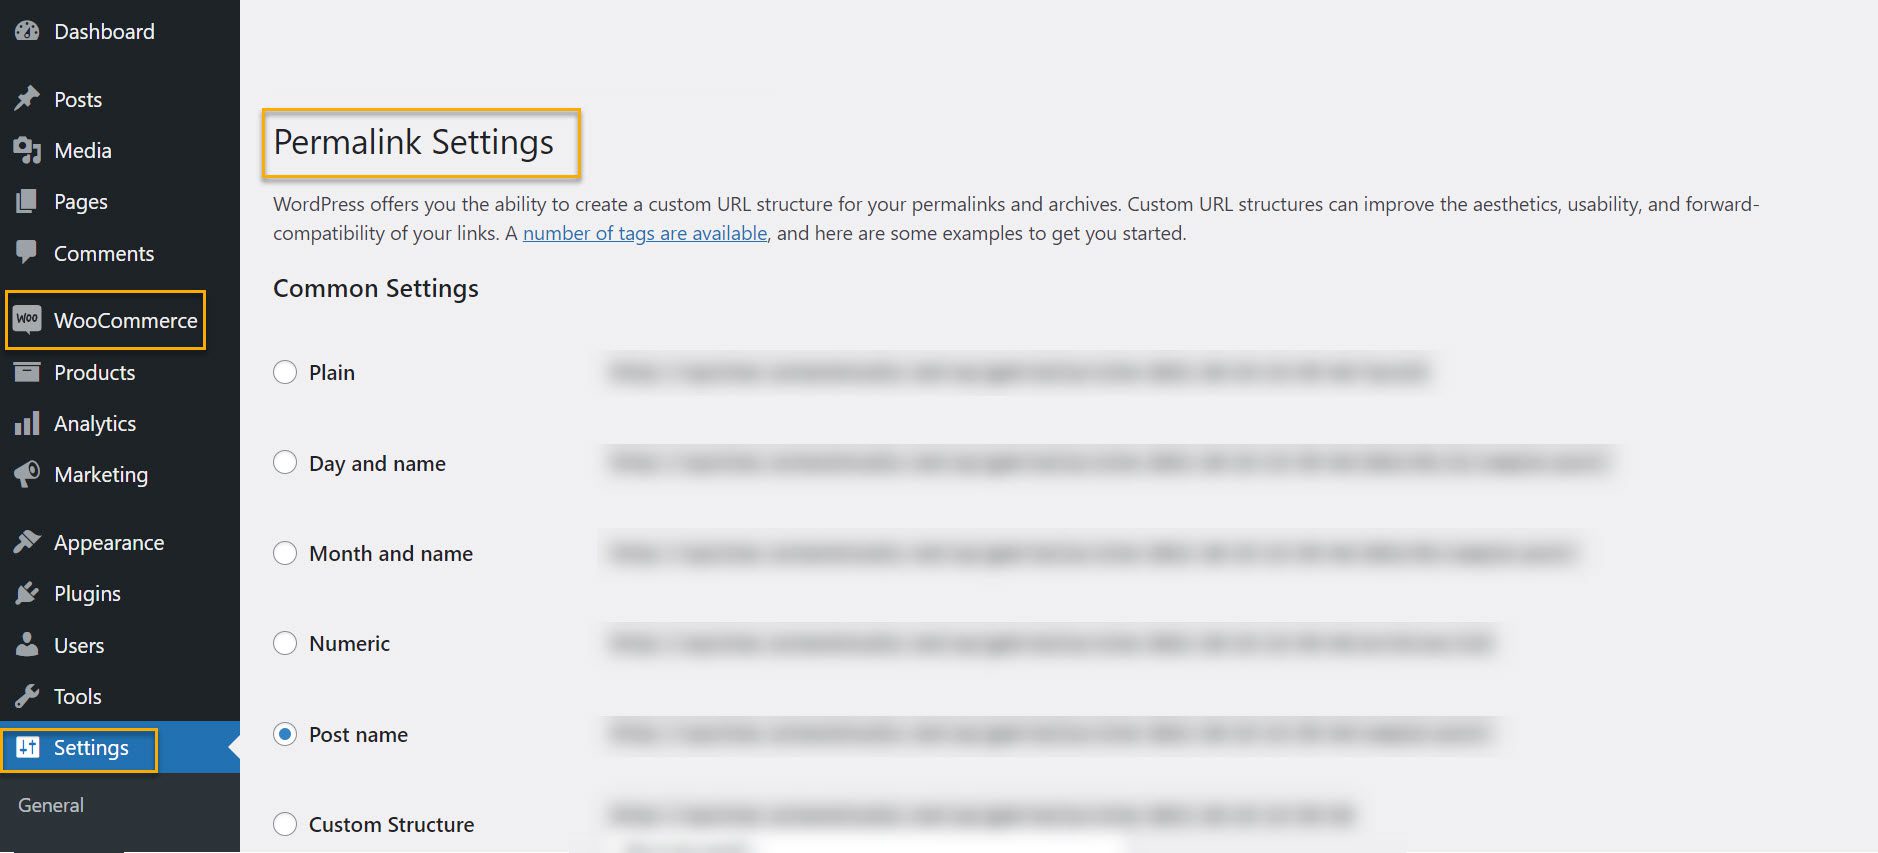
Types of Permalink Structures in WooCommerce
- Plain

This structure is bare-bones. The slug is the database’s page ID, which provides no information about the webpage you’re on. You’ll want to use a structure that provides readers and search engines with more information. Without it, users won’t remember the post ID, and it can lead to search engines believing your site isn’t legitimate.
2. Day, Month, and Name

If you create timely content in some way, such as a blog, this permalink structure may suit you. While most content on the internet is published with a date visible somewhere on the page, that date is usually updated when the content is updated. Therefore, the date will never change if you use one of the Day/Month and Name options, even if you update the post.
The advantage of this layout is that it allows your users to tell how old a post is right away. This can sometimes save them from looking for a date in the text to see if it’s still relevant. This design is commonly used by news and magazine websites and any website that produces time-sensitive content.
Whether or not this is correct, some readers may look at the date and conclude that the advice is no longer applicable. Including the publication date anywhere within your post is usually a good idea, but there’s no compelling reason to include it in your URL.
3. Numeric

The Numeric permalink structure is very similar to the Plain permalink format. This configuration, like Plain permalinks, uses the ID of your post as the slug and provides no additional information to users. In this case, you will also receive a short permalink, but there are no other benefits, so it should not be your first choice.
4. Post Name

The best part is that you can name your posts and pages whatever you want, and you can even change the slugs if they get too long. As a general rule, your slug should be between three and five words long. It will be easier for your visitors to remember this way, and search engines will determine what the content is about.
5. Custom Structure

The Custom Structure permalink configuration lets you control your site’s appearance. You can use static strings in addition to the variables listed above (such as percent category percent and percent post name percent).
For example, if you have a blog, you can separate your roundups and reviews into separate categories and include them in your links.
In practice, WordPress provides eleven structural tags for creating custom permalinks. Continue reading to find out what they are and how to use them; we’ll go over all the fundamentals in the following section.
How to Create Custom WooCommerce Permalinks
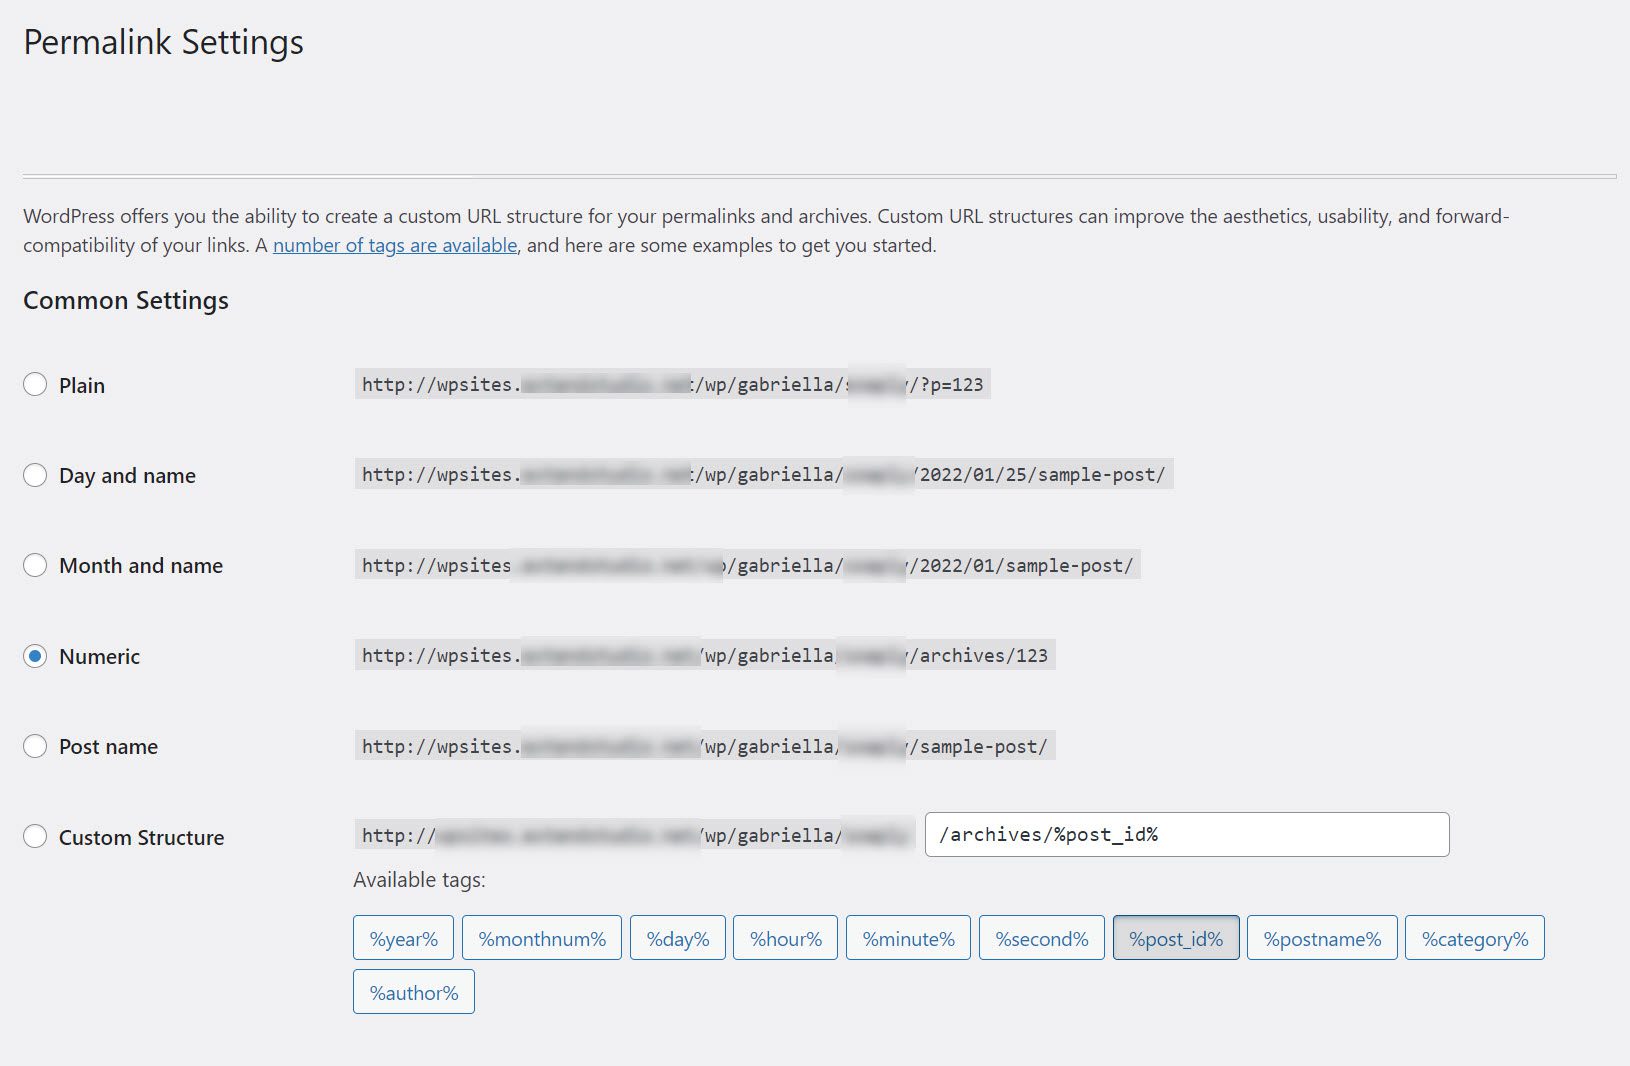
Here you have two options at your fingertips. You can either use a plugin, like Permalink Manager Lite Plugin, or use the Custom Structure Tags from WordPress. See the screenshot below:

You can find these tags in the Settings → Permalinks section of your WordPress dashboard.
- Custom Tags
In WordPress, you can use ten different structural tags to create custom permalinks.
- Date Tags: This category includes %year%, %monthnum%, %day%, %hour%, %minute%, and %second% and they all function properly. If you use any of these tags in your permalink structure, your URL’s corresponding numbers will appear.
- Post ID and Name: The tags for post ID and name are %postid% and %postname%. The first column displays the unique ID for each of your articles or pages, while the second column displays the full title of each.
- Category and Author: You can include these options using the %category% and %author% tags.
Go to your dashboard and select Settings → Permalinks from the drop-down menu to use any of these tags. Once you’re in, you can use any of the permalink structures we discussed earlier. If you want to create your structure, go to the bottom of the list and select Custom Structure.
It’s worth noting that you can use as many or as few tags as possible. To ensure that your content is evergreen, we recommend keeping things brief and avoiding dates if at all possible.
2. Permalink Plugin
If you’ve been using WordPress for a while, you’ll know that there are plugins for almost every scenario. It’s no different when it comes to permalink customization. One option is to use the Permalink Manager plugin.
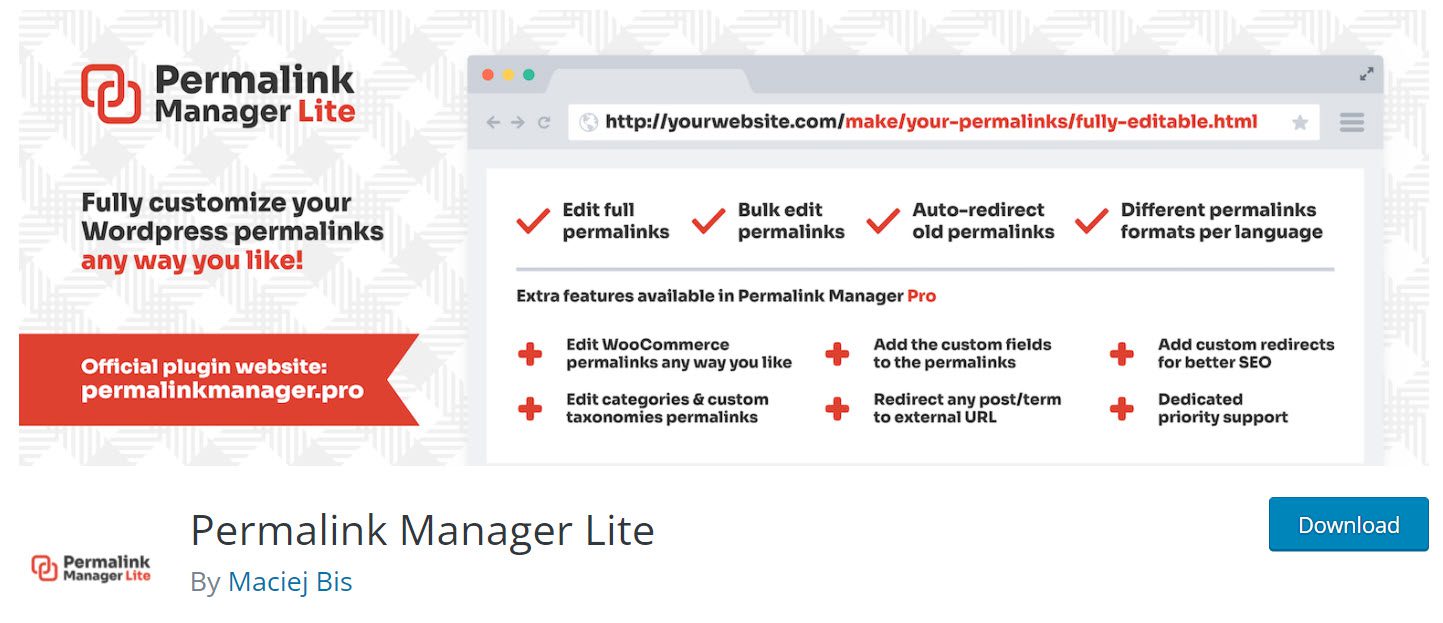
This tool allows you to change individual posts’ URLs and your posts and pages’ permalink structure from a single interface.
Install and activate the plugin, then navigate to the Tools > Permalink Manager tab. Inside, you’ll find a list of all your posts and the option to change their permalinks.
Permalink Manager Pro allows you to change the slug and the full URL address. In addition, it provides a screen option for determining how many URLs should be displayed per page. It is also possible to use the date filter to display the posts by month on the list.
How to Change WooCommerce Permalinks
There are several ways to accomplish this.
- Go to the Permalinks settings screen and enable the ‘pretty’ permalink.
- By changing the permalink structure for tags and categories in the Permalinks screen.
- By changing the slugs when creating and editing individual posts.
- By specifying the structure of links to the custom post types, either using the default or overriding it.
- By changing the way, permalinks are structured by writing a plugin. So, for example, you can use redirects to make an old permalink point to a new one.
Let’s take a look at each of these options:
To configure your permalinks, go to the Permalinks settings screen first. You can get to it by going to Settings → Permalinks.
The first section (Common Settings) is dedicated to single post settings. The options are mentioned earlier in the chapter when we discussed the different types of permalinks—Plain, date, month and name, numeric, post name, and custom structure.
The Custom Structure section allows you to create your own custom structured URL. You can use the tags given to you to retrieve information based on past data, and static text can add something that will not change between posts.
- %year% – the year of post-publication (four numbers).
- %monthnum% – the month of publication(two digits).
- %day% – the day of publication (two numbers).
- %hour% – the hour of publication (two numbers).
- %minute% – the minute of publication (two numbers).
- %second% – the second of publication (two digits).
- %post_id% – the post unique ID (integer).
- %postname% – the post slug (i.e., the sanitized string representing the post’s title).
- %category% – the category slug.
- %author% – the author slug.
Any of these tags presented above will generate a different permalink, each with the information provided by you.
In addition to the settings for individual posts, the Permalinks Structure screen allows you to create a custom structure for your category and tag archives.
If you don’t do this, the permalink will include /category/category-slug/ at the end. So, if you have a category called ‘featured,’ the archive page for that category would be yoursite.com/category/featured.
How to Change WooCommerce Permalinks for Single Posts and Pages
We’ve discovered that it’s best to do this while creating your content. If you change the slug of a post, you will change its URL, and any links you or your visitors shared previously will no longer work.
To change the slug of a post, go to the post editing screen for that post. Then, select the post you want to edit from the Posts menu. (If you’re already working on the post, you’ll be on the right screen.)
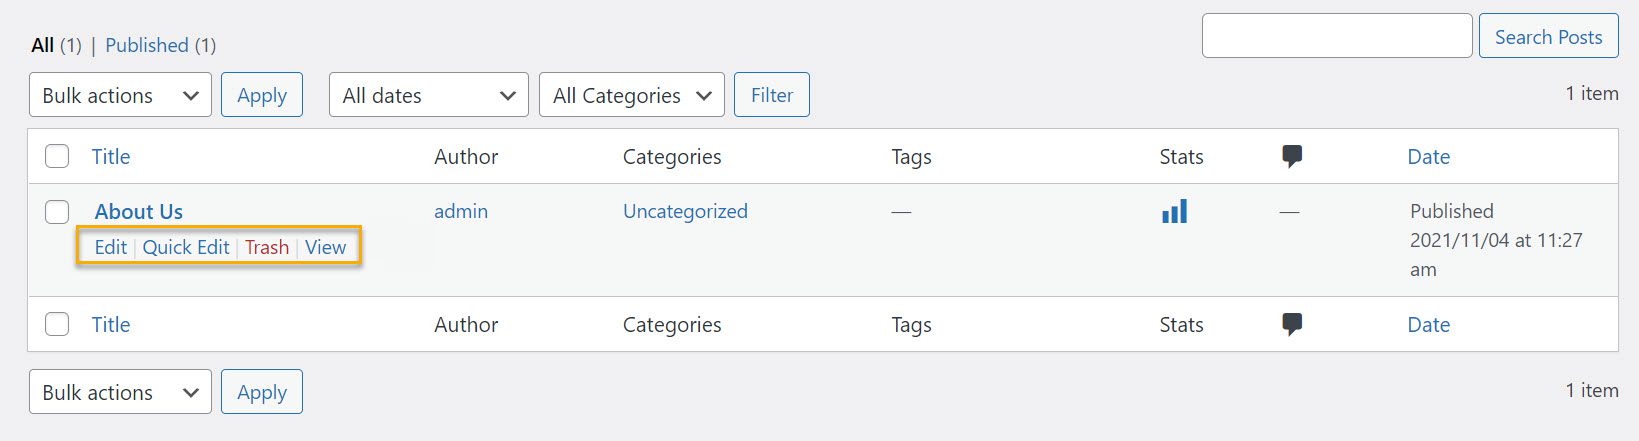
Select the first option, ‘Edit,’ then when the page opens, head over to the small settings icon on the top right side of the screen, click on ‘Post,’ and ultimately go to ‘Permalink.’
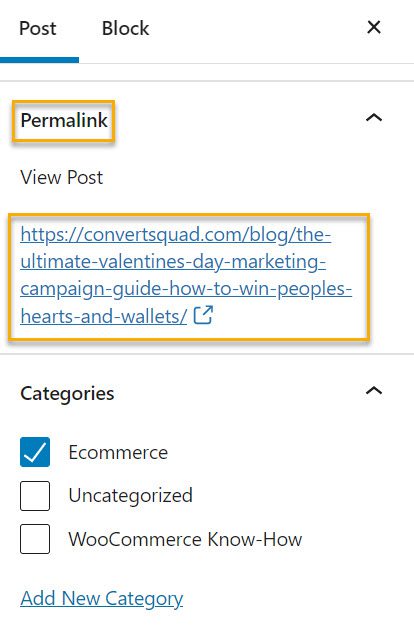
The page will generate an automatic slug, displayed in the URL Slug field. You can change the slug to make it shorter or more on point.
Hint: Topic-relevant permalinks are better for UX because they make it easier for users to remember and use URLs on your site. If your contact page’s URL is yourcoolsite.com/, no one will remember it. p=456. However, they will remember yourcoolsite.com/contact.
Now that you’re familiar with the intricacies of WooCommerce permalinks, let’s look at some best practices for dealing with these nefarious figures and how you can rank higher in terms of SEO.
Best Practices for SEO-Friendly Permalinks
So we already know that a permalink is a permanent URL of a specific page or blog post. Why the word ‘permanent’? Because this link should ideally remain unchanged. Visitors will access the page or post instead of receiving an error because the URL has been changed.
Using SEO-friendly URLs or permalinks can help your website rank higher in search results. This is because Google prioritizes user experience, and it also helps search engines understand what your page is about.
First of all, an SEO-friendly URL should:
- Include a target keyword;
- Not include dates or years;
- Be easy to read and use hyphens instead of underscores;
- Follow a template structure.
Let’s take a closer look at each of these.
- Include a target keyword
A target keyword is a word or phrase that you want people to type into a search engine to find your page. Including your target keyword in the URL can assist you in ranking for that keyword.
Even though the ranking signal for keywords in the URL is minor, it is still a ranking signal. And you want as many people to see your content as possible.
More importantly, it describes your content and makes it easier for users and search engines to understand what your page is about.
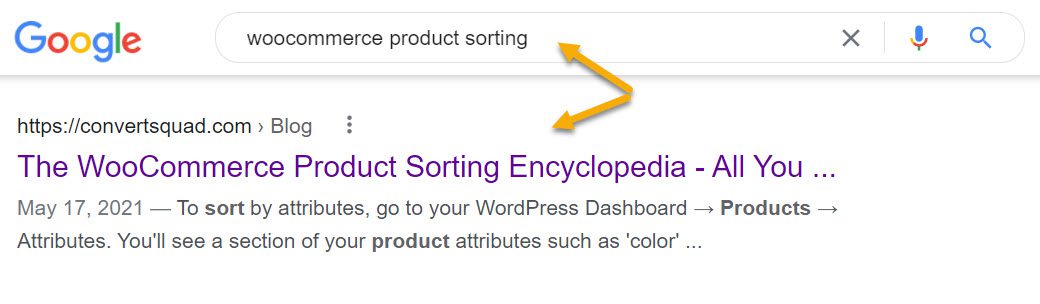
For example, if I search for ‘woocommerce product sorting,’ I will almost certainly find articles related to WooCommerce product sorting.
Case and point:
2. Don’t include dates or years
Unfortunately, no one is interested in something written in 2011, even if it is still relevant.
Even if you regularly update your content, the URL will still show the original publishing date, making your content appear old and out of date. On the other hand, failing to include dates and years causes your permalinks to expire yearly.
3. Use hyphens instead of underscores
Google suggests that you use hyphens instead of underscores in your URLs. This is because using hyphens instead of underscores allows Google’s web crawler to compute the information on your website more efficiently and produce consistent results.
Your computer and web crawlers read hyphens and spacers, which results in something like this. On the other hand, the use of an underscore serves as a concatenation signifier. This means that underscores allow humans to space out the words they use, but computers do not.
This means that computers will interpret which-creates-something-that-looks-like-this as whichcreatessomethingthatlookslikethis. And you definitely don’t want that.
4. Follow a template custom structure
If you have a large website, you can categorize your URLs using WordPress-specific tags.
For example, if you run an eCommerce website, you may want to include the product category in your URLs to make it easier for users to determine what product the page is about.
Like this:
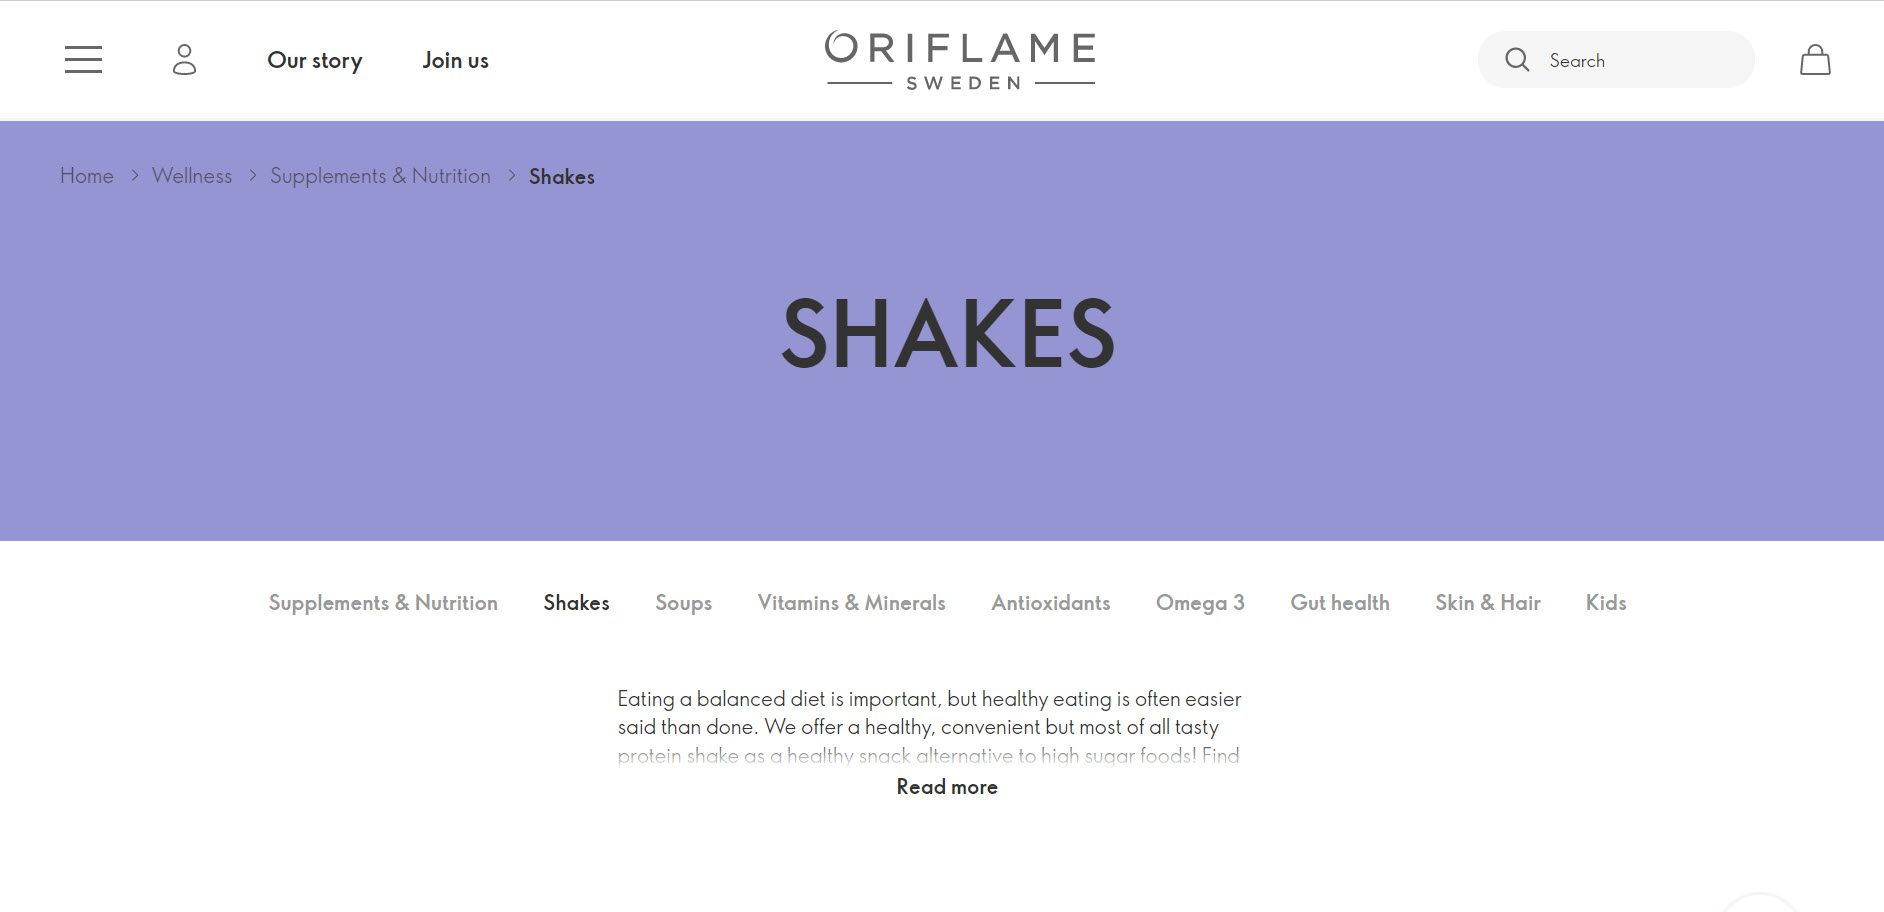
URL:

To include categories or other variables in your URLs, return to the Permalinks settings page and select the Custom Structure option.
What happens when you modify a URL?
Let’s say you want to rename a category for specific products. For example, maybe you have a pharmacy brand and had “healthy” as a category, and now you want to use “wellness.”
Which would be the implications for such a change?
If someone bookmarked that initial URL and wanted to revisit it, that page would not exist. And it would deliver a 404 error. More info on 404 pages here. In the eyes of Google, this is a broken link, and he kind of doesn’t enjoy them.
If some other sites have already been linking to that page, and people would click on the link, they would end up on this non-existing page. And this is a bad user experience, and Google could sanction you, SEO-wise.
Ideally, you should now have such 404 pages, but if you do, at least make them pleasant and provide them a way out to your shop or other important pages of your site.

How can you avoid these error pages while still making URL changes?
Well, start by constantly updating your sitemap and redirect those missing pages via a 301 (permanent redirect) to the new page that matches the old one in terms of topical focus.
What’s a 301? Three hundred one redirects assist in resolving 404 page not found errors and directing users to the correct page. In addition, it aids in improving your keyword rankings and providing a better user experience.
A redirect is a quick message sent by your website to your reader’s browser informing them that the page they want to visit has been moved, so their browser can automatically point them to the new page of your choice.
When you plan to delete a post or page in favor of new content, you must create a 301 redirect. It is also required if you intend to change the permalinks of your post or page.
Over to You
Now that you understand what permalinks are all about, it’s time to put this knowledge and tips and tricks into action and watch your SEO rankings and user experience improve before your eyes.

Gabriella is a Digital Content Writer and Marketer with a zeal for all things WordPress. When she’s not researching and drafting the upcoming articles, you can find her in the open air exploring the outdoors with her dog.


Comments are closed