
Are you looking for some pointers on setting up WooCommerce shipping on your website? Or are you just lost in the amount of information out there? Well, either way, you’ve come to the right place!
How consumers see your brand and its overall success is strongly linked to the shipping service. Since it directly impacts the customer experience, shipping is one of the most important aspects of a WooCommerce shop.
Because of the technological and logistical difficulties, it is also one of the most challenging areas to tackle for eCommerce store owners. Luckily for you, there is a range of plugins available to help store owners deal with any shipping issues they may encounter.
In this article, you will learn about the basics of WooCommerce shipping, how to shed some light on the built-in shipping features, and one of the most popular and widely used shipping plugins.
Let’s dive straight in!
Things You Need to Know About WooCommerce Shipping
Before we get into how you can set up shipping on your online store, let’s take a step back and look at the essential things you need to know. ?
Shipping Options
WooCommerce provides three standard shipping options, with extensions allowing even more flexibility. Let’s take a look at the three most popular shipping options:
- Flat Rate Shipping
The term “flat rate” refers to the shipping cost being unrelated to the shipped object’s weight, shape, or size. It’s determined by how much you can fit into the USPS box. With flat-rate shipping, the importance of the parcel does not affect shipping costs. If you transport heavy goods, that’s going to save you money. On the other hand, flat-rate shipping can be more costly if your packages are lightweight.
- Free Shipping
Retailers have a pretty good reason to appreciate the free shipping. Customers will spend more money on your products, and the appeal of free shipping will result in higher conversion rates. However, the average retailer must think strategically about when and how free shipping ends up paying.
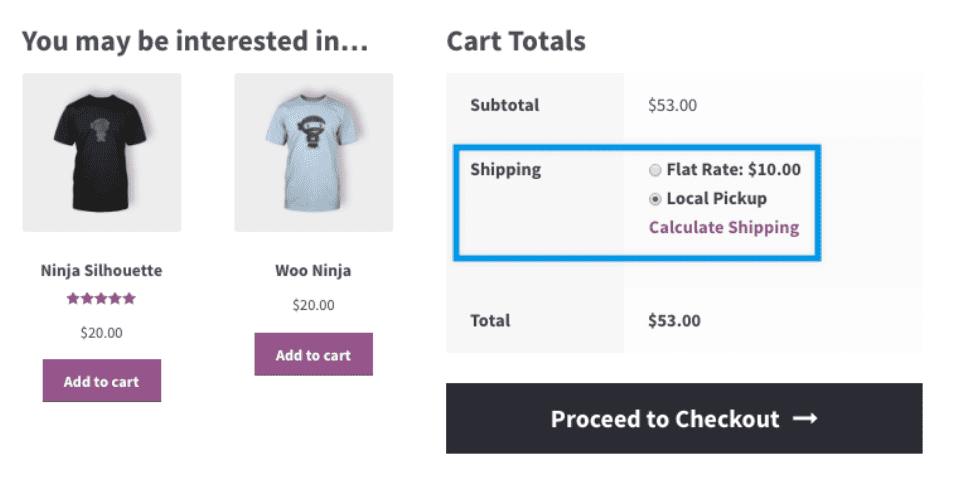
Adding the free shipping option to your products (just like in the example below) can generate higher revenue, increased profit, and helps to establish a trustworthy bond with your customers. Another thing to consider is adding discount coupons to your products to make your clients more likely to purchase.

Source: burton.com
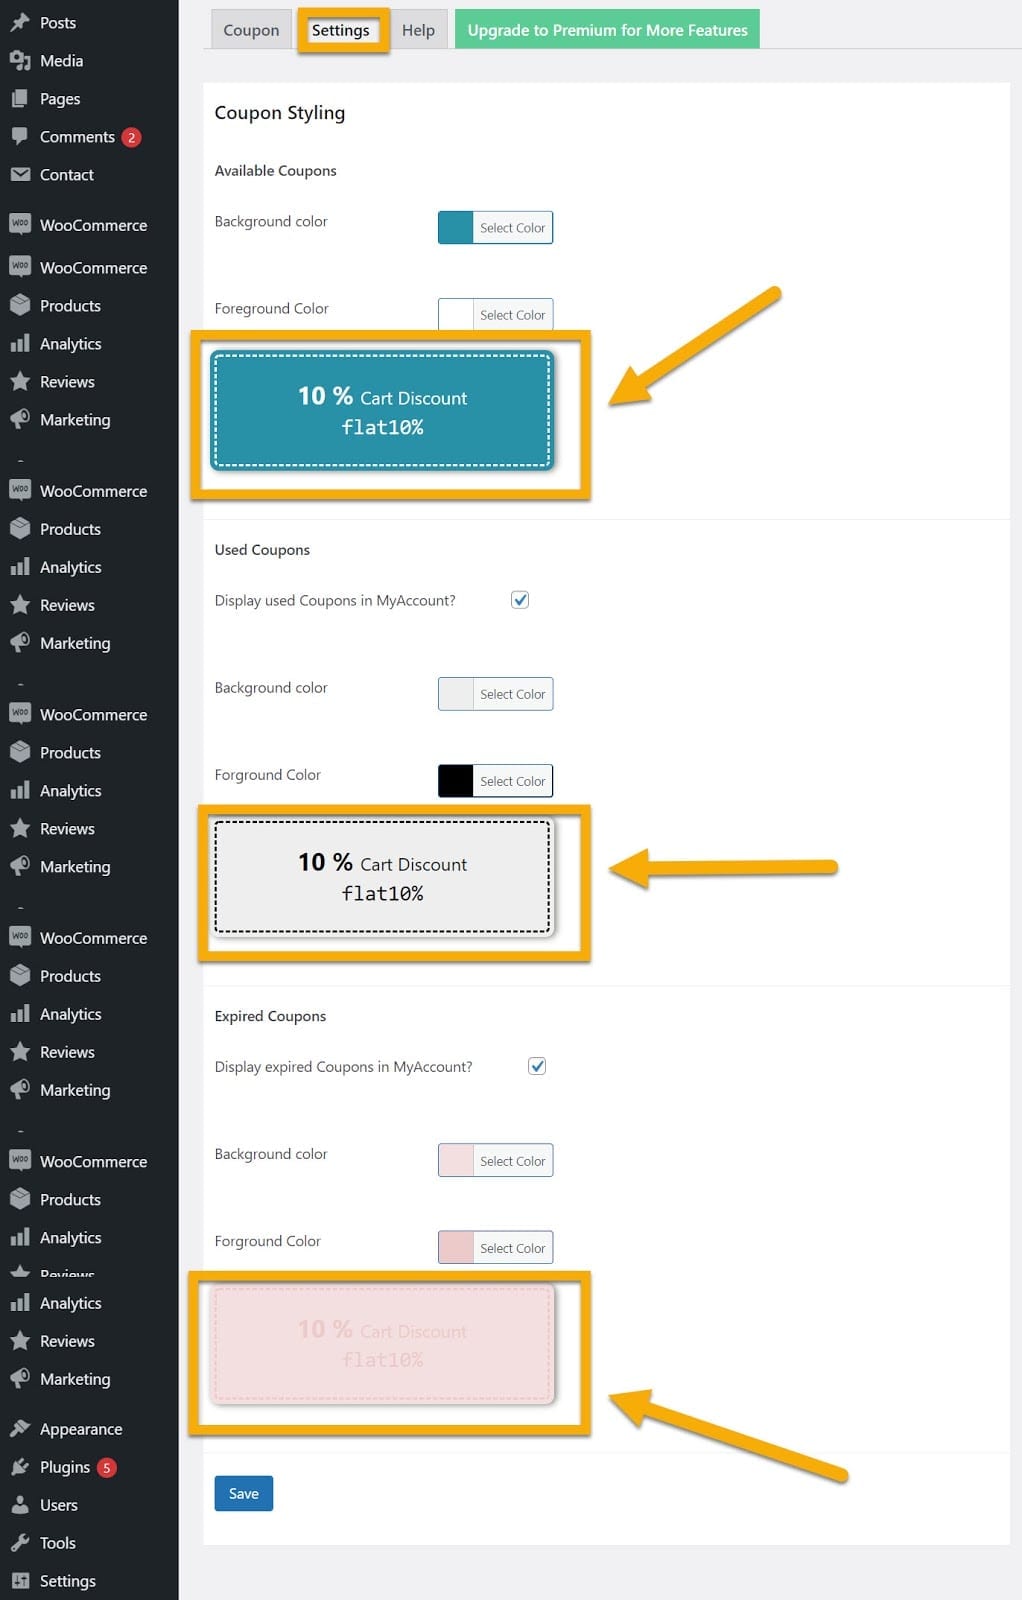
How can you create a coupon for free shipping?
Just head to your WordPress Dashboard → Plugins → Add New → and install the Smart Coupons for the WooCommerce plugin. Once you activate it, go to settings and pimp your coupon however you please.
See the screenshot below.?
- Store Pickup
Omni-channel eCommerce sites have a distinct quality over their digital competitors in ‘Store Pickup’ options, which are usually free and fast.
This means that customers will pick up their online orders at your retail place, curbside, or any other location you specify. Enable the local pickup choice for each site where customers can pick up their orders to accomplish this. The local pickup shipping rate comes with no costs.
Steps to set up store pickup:
- Go to WooCommerce → Settings → Shipping.
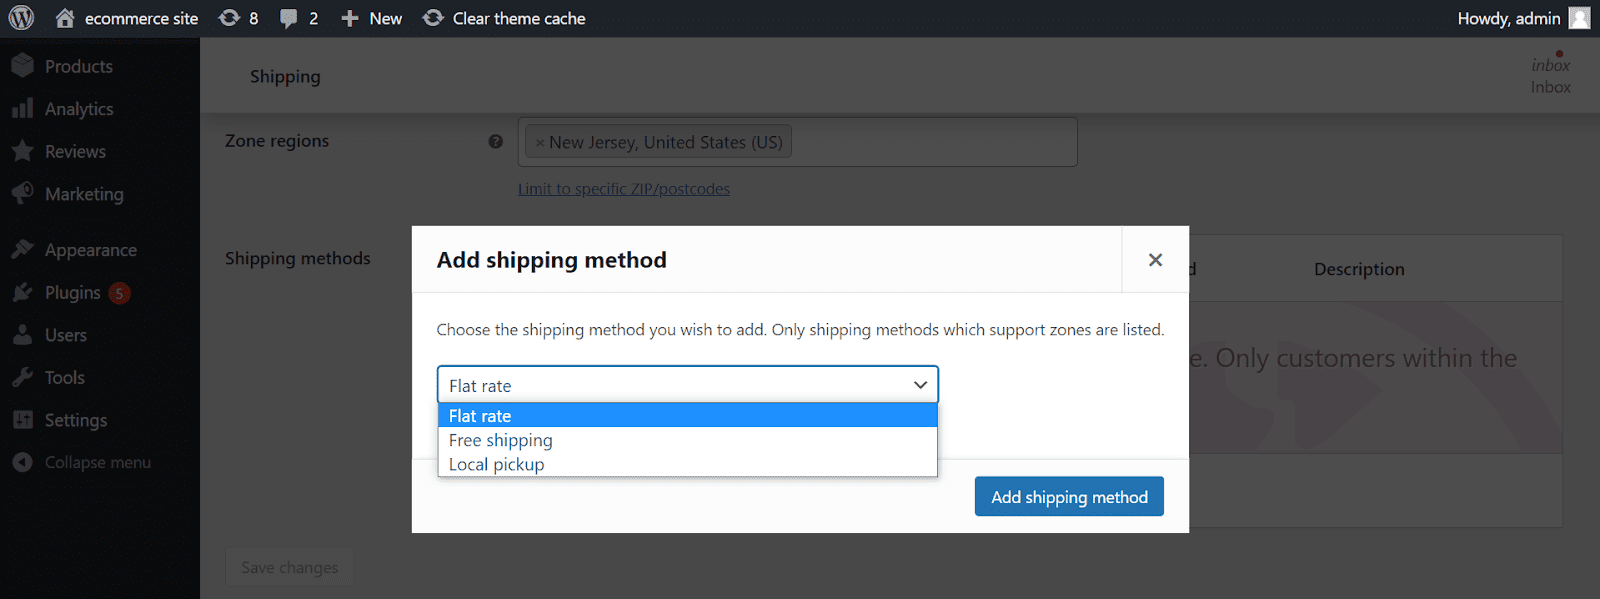
- Select a Shipping Zone, and click the + icon to Add Shipping Method.
- Select Local Pickup from the dropdown.
- Click Add shipping method.
- Click Local Pickup in the row you wish to define.
- Select a headline, such as: ‘Local Pickup.’
- Define taxes.
- Enter the cost.
- Save changes.
What About WooCommerce Shipping Zones?
Shipping zones stand for the geographical areas in which you deliver your goods. This feature enables carriers to quantify distance in zip code groups and let you know whether the product can or can not be delivered to your address.
You need to attach shipping methods to every shipping zone that you generate. The good part is that WooCommerce has three shipping methods already at your service, so you can decide which one you’ll choose: flat-rate, free shipping, local pick-up.
Head over to your WordPress Dashboard → WooCommerce → Settings → , and lastly, click on Shipping.
Once you’re there, make sure to set the shipping zone and region in which your business operates.
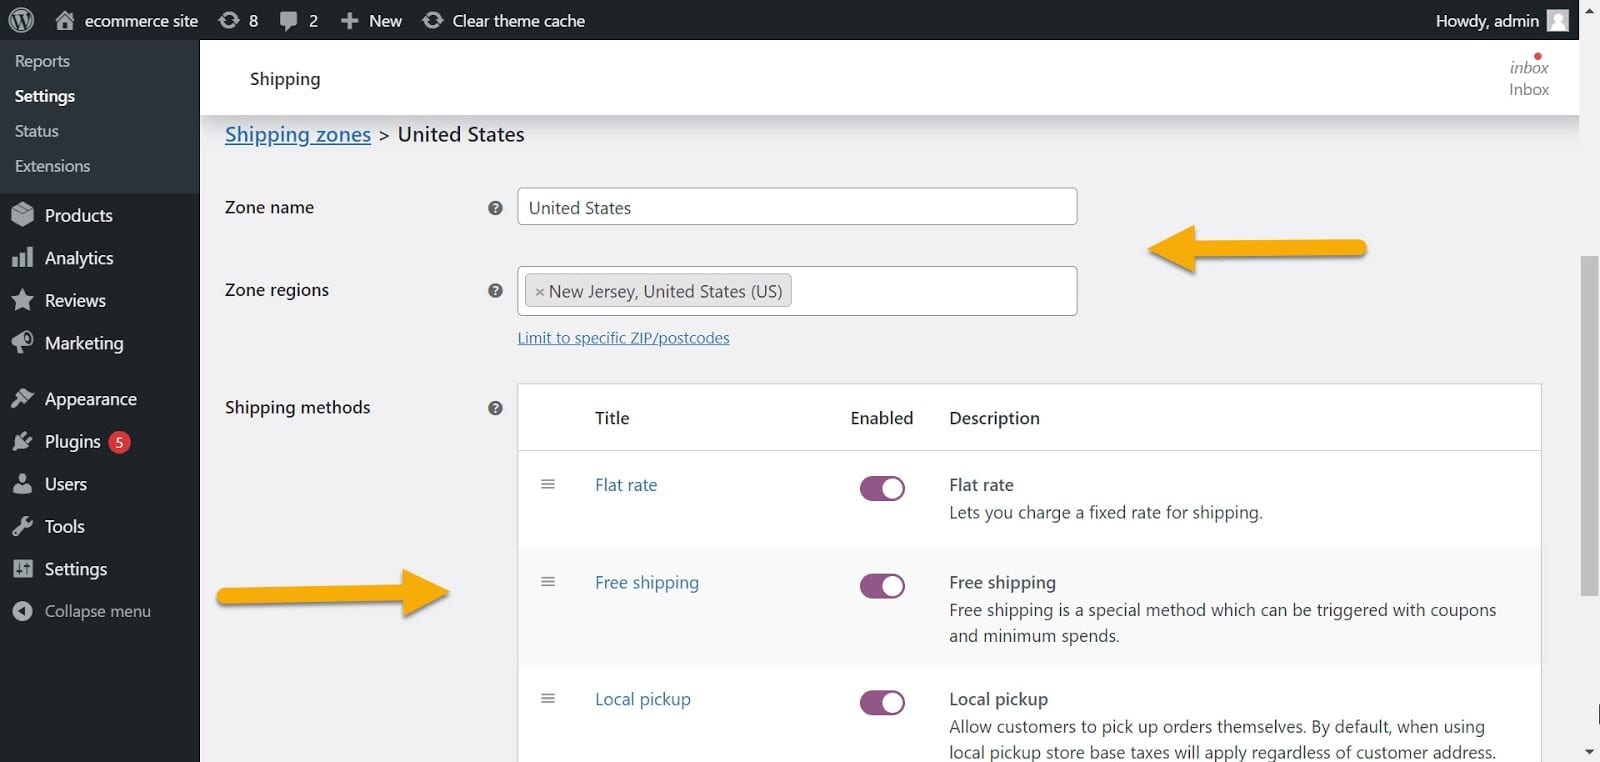
Then, decide upon a shipping method from the three we’ve already discussed. ?
Once you’re done, click the Save changes button to proceed.
What About WooCommerce Shipping Classes?
Shipping classes are used for similar grouping types of products and offer the same shipping methods and rates for products within the same group. T-shirts, for example, may require a lower shipping rate than something heavier or slightly more prominent.
Shipping classes work alongside zones and shipping methods. To set them up, go to the Shipping Classes sections and click Add Shipping Class. Next, try adding a title and URL slug for each shipping class and characterization of the product.

To assign shipping classes to your products, head to All Products and open the product you’d like to give a shipping class. Next, scroll to the bottom of the Product Data section and click the Shipping Tab. It should look like this: ?
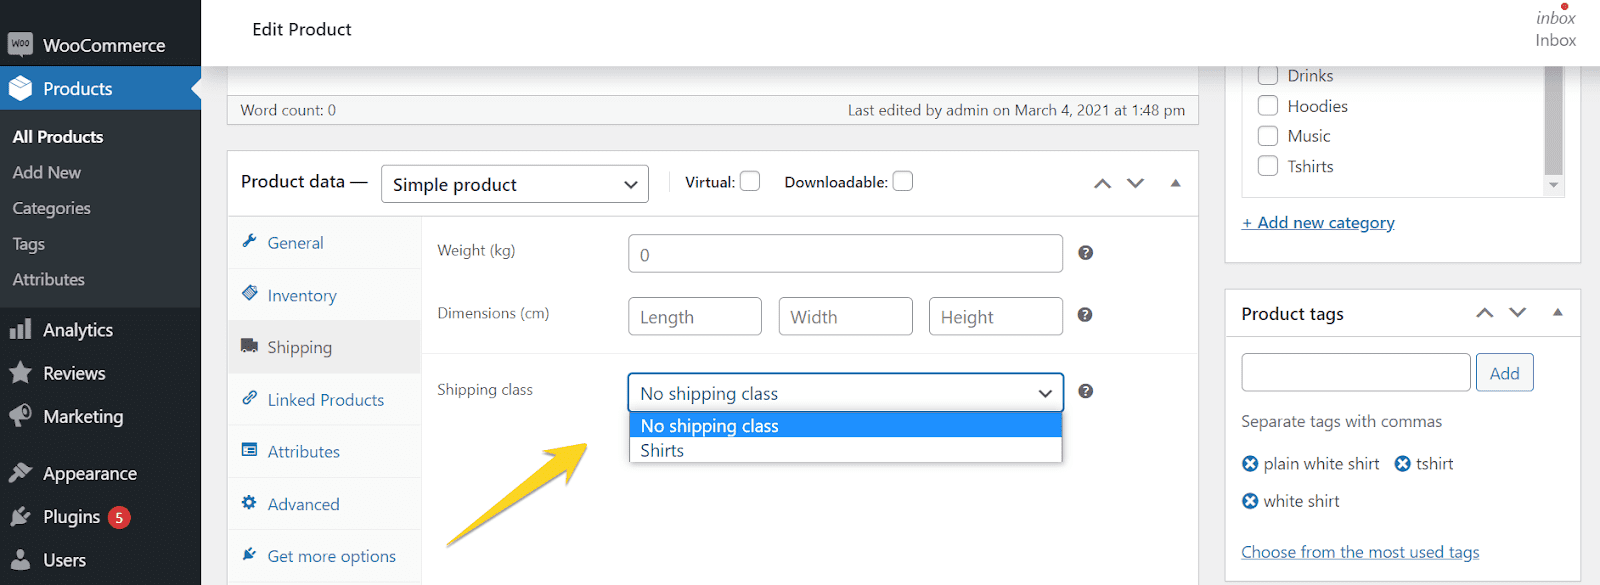
Notice that you can assign different shipping classes to each variation if you sell variants of the same product. This can be achieved by moving to Variations in the Product Data portion.
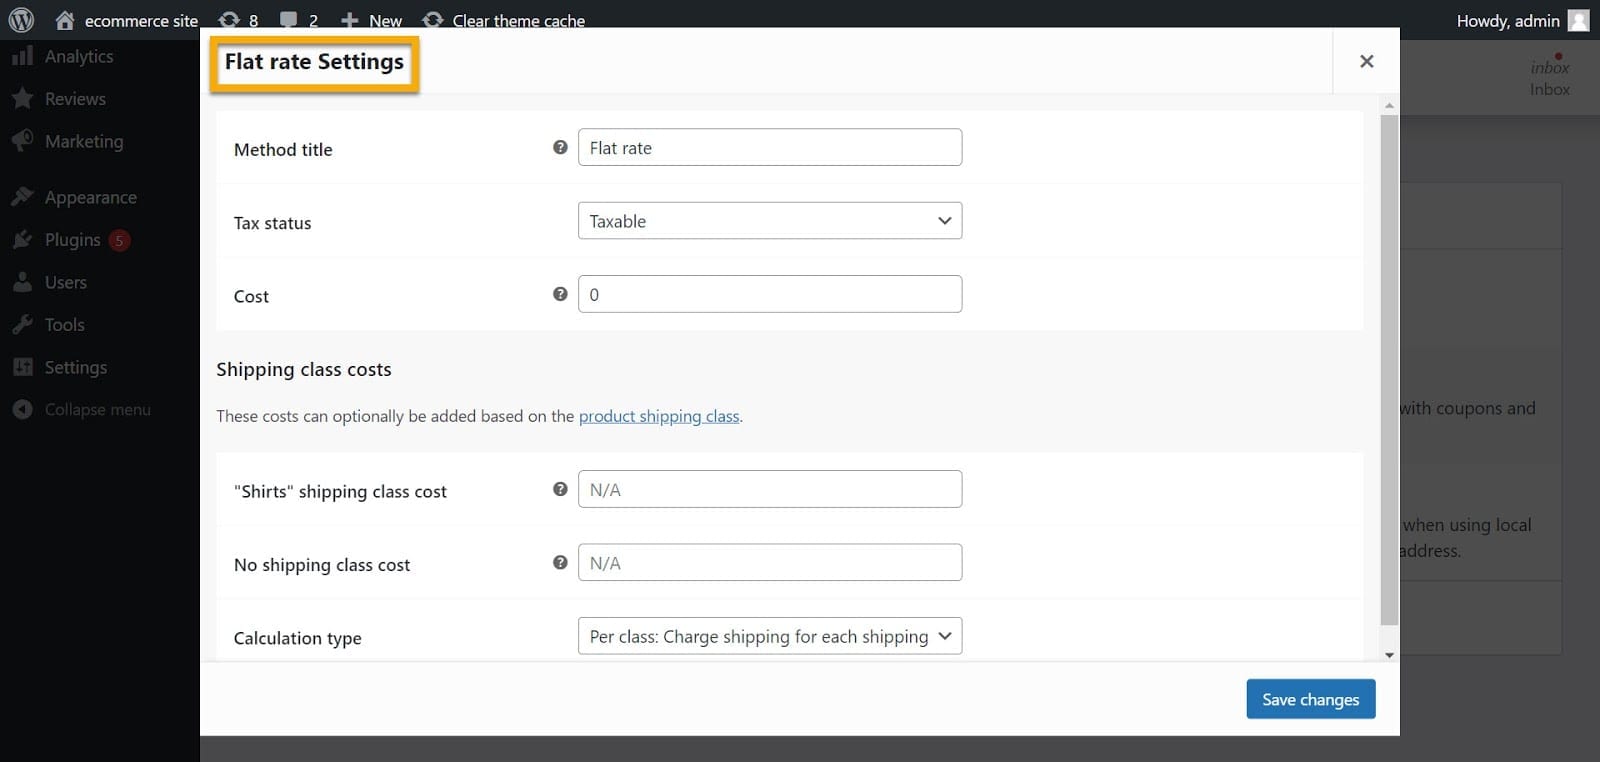
Finally, there is a distinct Shipping Class Costs field in the shipping method settings methodology. This ultimately allows you to choose the class’s shipping cost and consider other relevant details that you might want to fill out. Find all information under the Flat rate Settings section.
That being said, we’ve covered pretty much every aspect of WooCommerce’s built-in shipping options. Now, let’s look at some of the official and third-party WooCommerce extensions that can help you improve shipping at your shop.
You’ll need the aid of a plugin to set up more complicated WooCommerce shipping rates. To get you going, here are a few extensions you can start with:
Customers can monitor their shipments by connecting to several carriers and viewing shipment timelines.
This is a versatile shipping system for WooCommerce that calculates shipping costs based on order weight. In addition, you can use the plugin to create several rules based on different conditions.
For table rate shipping, this is a common alternative. First, enable stock and subtotal shipping conditions. Then, calculate the prices and approaches using conditional logic.
Create and incorporate any shipping condition using totals, weight, quantity, shipping grades, and other parameters.
ShipStation, a paid eCommerce shipment and fulfillment solution, can be seamlessly incorporated with your WooCommerce shop. This plugin streamlines your shipping and fulfillment activities, enabling you to ship faster—and for less money—while still offering branding resources that will please your customers.
Final Thoughts
A lot is going on here, and the more things you have, the more complicated shipping becomes. However, running an online store and selling physical items comes with lots of shipping options and discussion to understand every little aspect of it, regardless of what platform you use.
So make sure you don’t rush into it and take time to comprehend what goes around WooCommerce shipping entirely.
We hope this article was helpful to you, and feel free to share your thoughts on it in the comment section below. We’d love to hear from you!

Gabriella is a Digital Content Writer and Marketer with a zeal for all things WordPress. When she’s not researching and drafting the upcoming articles, you can find her in the open air exploring the outdoors with her dog.


Comments are closed